Embarking on the journey of creating your own drawstring bags is a rewarding endeavor, offering both practical utility and a canvas for personal expression. This guide will illuminate the path, from understanding the fundamental components and essential tools to mastering the step-by-step construction process. We will explore fabric choices, precise cutting techniques, and the nuances of creating a secure and functional drawstring casing, ensuring your finished bag is both beautiful and durable.
Delving into the intricacies of fabric selection, preparation, and cutting lays the groundwork for a successful sewing project. Each step, from sewing the main body to inserting the drawstring, is meticulously detailed to empower even novice sewers. Beyond the basic construction, we will also touch upon creative customization options and address common troubleshooting issues, ensuring a smooth and enjoyable crafting experience.
Understanding the Basics of Drawstring Bags
A drawstring bag is a wonderfully versatile sewing project, perfect for beginners and experienced crafters alike. Its simplicity lies in its core design: a fabric pouch with a drawstring closure that allows it to be easily opened and closed. This functional design makes it ideal for a multitude of uses, from storing small items and gifts to carrying gym clothes or groceries.
Before we dive into the sewing process, let’s familiarize ourselves with the fundamental elements that constitute a typical drawstring bag.Understanding these basic components will provide a solid foundation for successful construction. We will explore the essential parts of the bag, the types of fabrics that lend themselves well to this project, the tools you’ll need, and the most effective stitches to use.
Fundamental Components of a Drawstring Bag
A standard drawstring bag is comprised of a few key elements that work together to create its functional form. The main body of the bag is typically a single piece of fabric folded in half or two separate pieces sewn together to form a pouch. The top edge of this pouch is then folded over to create a channel, through which the drawstring is threaded.
The drawstring itself, usually a cord or ribbon, passes through this channel, allowing the bag to be cinched shut. Some designs may also include a flat bottom or gusseted corners to provide more structure and capacity.
Common Fabric Types for Drawstring Bags
The choice of fabric significantly impacts the look, feel, and functionality of your drawstring bag. Different materials offer varying degrees of durability, drape, and aesthetic appeal, making them suitable for different purposes. When selecting fabric, consider how the bag will be used. For instance, a bag intended for carrying heavier items will benefit from a sturdier material.Here are some common fabric types suitable for making drawstring bags:
- Cotton Canvas: This is a robust and durable fabric, excellent for bags that need to withstand regular use and carry heavier items. It holds its shape well and is available in a wide array of colors and prints.
- Cotton Poplin/Quilting Cotton: Lighter and more flexible than canvas, these fabrics are ideal for smaller gift bags or bags for delicate items. They are easy to work with and offer a vast selection of patterns.
- Linen: Linen provides a natural, breathable, and elegant drape. It’s a good choice for more sophisticated drawstring bags, though it can wrinkle more easily than cotton.
- Nylon Ripstop: This is a very lightweight yet strong fabric, often used for reusable shopping bags or laundry bags due to its water-resistant properties and ability to resist tearing.
- Polyester Blends: These can offer a good balance of durability, wrinkle resistance, and affordability. They are a versatile option for many types of drawstring bags.
Essential Sewing Tools and Notions
To successfully create a drawstring bag, having the right tools and notions at your disposal will make the process smoother and more enjoyable. These items are standard for most sewing projects and are crucial for accurate cutting, stitching, and finishing.The following is a list of essential sewing tools and notions required for this project:
- Sewing Machine: While hand-sewing is possible, a sewing machine will significantly speed up the process and provide stronger seams.
- Fabric Scissors: Sharp scissors dedicated to cutting fabric are essential for clean, precise cuts.
- Rotary Cutter and Cutting Mat: For more precise and faster cutting, especially for straight lines.
- Measuring Tape or Ruler: For accurate measurements of fabric pieces.
- Fabric Marker or Chalk: To mark cutting lines and sewing guides on the fabric.
- Pins: To hold fabric pieces together securely while sewing.
- Iron and Ironing Board: Crucial for pressing seams and creating crisp folds, which are vital for a professional finish.
- Thread: Choose a good quality all-purpose polyester thread that matches or complements your fabric.
- Drawstring Material: This can be cord, ribbon, or even a strip of fabric. The width and length will depend on the size of your bag and your aesthetic preference.
- Safety Pin or Bodkin: Used to thread the drawstring through the channel.
Effective Stitch Types for Drawstring Bag Construction
The type of stitch used directly impacts the durability and appearance of your sewn items. For drawstring bags, a combination of strong and neat stitches is ideal. Understanding these basic stitches will ensure your bag holds together well and looks polished.The following stitch types are most effective for constructing a drawstring bag:
- Straight Stitch: This is the workhorse stitch for most sewing projects. It’s used for sewing seams together, creating the main body of the bag, and attaching any structural elements. For added durability, you can reinforce the beginning and end of the stitch by backstitching.
- Zigzag Stitch: A zigzag stitch is excellent for finishing raw edges of the fabric to prevent fraying. It can be used along the seam allowances or around the opening of the drawstring channel. A narrow zigzag is often preferred for a neater finish.
- Hemming Stitch (or Double Fold Hem): This is the stitch used to create the channel for the drawstring. It typically involves folding the top edge of the fabric over twice and then stitching it down. This creates a clean, enclosed edge that hides the raw fabric and provides a sturdy channel for the drawstring.
The straight stitch provides the primary structural integrity, while the zigzag stitch and proper hemming techniques ensure a professional and durable finish, preventing unraveling and creating a functional drawstring channel.
Step-by-Step Construction Guide
Now that we have a solid understanding of the basics, let’s dive into the practical aspect of creating your very own drawstring bag. This guide will walk you through each essential step, from preparing your fabric to the final insertion of the drawstring, ensuring a beautifully finished and functional bag.This section focuses on the sequential construction of a standard drawstring bag.
We will cover the precise cutting of fabric, the techniques for sewing seams, the creation of the drawstring casing, and the finishing of the bottom edge.
Fabric Cutting for a Standard Drawstring Bag
Accurate fabric cutting is fundamental to achieving a well-proportioned and professional-looking drawstring bag. The dimensions of your fabric pieces will directly influence the final size of your bag. For a standard bag, you will typically need two rectangular pieces of fabric.
To prepare your fabric pieces, follow these measurements for a medium-sized bag:
- Main Bag Pieces: Cut two identical rectangles. A common size is 16 inches wide by 18 inches tall. These dimensions will allow for a generous bag size and a substantial casing.
- Drawstring Channels (Optional, for a neater finish): For a more refined look, you can cut two additional strips. These should be the width of your main bag pieces (16 inches) and approximately 2 inches tall. These strips will be folded and sewn to the top edge of the main bag pieces to create a dedicated channel for the drawstring. If you choose not to use separate strips, the casing will be formed directly from the main bag fabric.
Sewing the Side Seams of the Bag
With your fabric pieces cut, the next crucial step is to join them to form the body of the bag. This involves sewing the side seams and the bottom edge, ensuring they are securely fastened for durability.
To sew the side seams:
- Place the two main bag pieces right sides together. Ensure that all edges are aligned evenly.
- Using a sewing machine, stitch along both side edges, leaving the top edge open. A standard seam allowance of ½ inch is recommended.
- For added strength, especially if your fabric is prone to fraying, consider finishing the raw edges of the seams. This can be done using a serger, a zigzag stitch along the raw edges, or by pinking the edges with pinking shears.
Creating the Casing for the Drawstring
The drawstring casing is the channel through which the cord or ribbon will pass to close the bag. A well-constructed casing ensures the drawstring glides smoothly and holds the bag securely.
The process for creating the casing depends on whether you used separate strips or are working directly with the main fabric. Here’s how to create a casing using the optional strips:
- Take one of the smaller accent strips and one of the main bag pieces. Place the right side of the accent strip against the wrong side of the main bag piece, aligning the top raw edges. Sew them together with a ½ inch seam allowance.
- Turn the accent strip up, so it is now on the right side of the main bag piece, encasing the raw edge. Press the seam flat.
- Fold the raw edge of the accent strip down by ½ inch towards the wrong side of the bag, creating a clean folded edge. Press this fold.
- Fold the entire accent strip down again, aligning the folded edge with the top edge of the main bag piece. This creates a double-folded channel. The width of this second fold will determine the height of your casing. For a standard drawstring, a fold of about ¾ inch to 1 inch is ideal. Press firmly.
- Stitch close to the folded bottom edge of the accent strip, securing the casing. Ensure you leave an opening of about 1 inch at the side seam to insert the drawstring later. Repeat this process for the other side of the bag.
If you are not using separate strips, you will fold down the top edge of the main bag pieces twice, as described in steps 4 and 5 above, to create the casing directly from the main fabric.
Finishing the Bottom Edge of the Bag
The bottom edge of your drawstring bag needs to be finished securely to prevent fraying and to provide a neat appearance. This is typically done during the side seam construction.
The bottom edge is completed concurrently with the side seams:
- After sewing the side seams with the right sides of the fabric together, the bottom edge remains open.
- To finish this edge, simply turn the entire bag right side out. The side seams you’ve sewn will naturally create a closed bottom. If you have concerns about fraying at the very bottom edge, you can reinforce it with a zigzag stitch or by using pinking shears before turning the bag right side out.
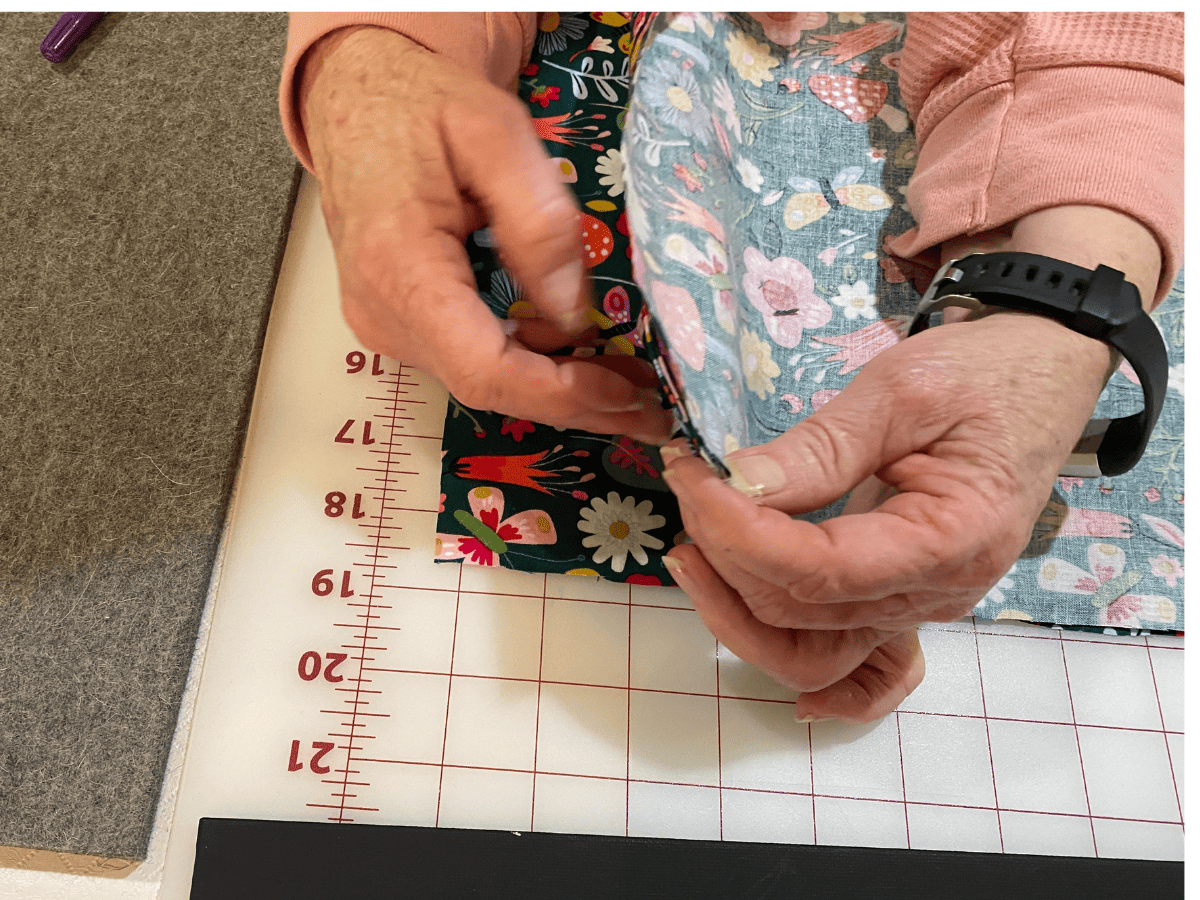
Inserting the Drawstring
The final step is to thread the drawstring through the casing, allowing you to cinch the bag closed. The method of insertion is straightforward and essential for the bag’s functionality.
To insert the drawstring:
- Cut your drawstring material (cord, ribbon, or shoelace) to the desired length. A good starting point is twice the width of the bag, plus a few extra inches for tying.
- Attach a safety pin or a bodkin to one end of the drawstring.
- Insert the safety pin into one of the openings in the casing.
- Carefully guide the safety pin through the entire channel of the casing until it emerges from the other opening.
- Once both ends of the drawstring are out of the casing, remove the safety pin.
- Tie the two ends of the drawstring together securely. You can knot them together or create a simple bow.
- Repeat this process for the second casing, ensuring you have two separate drawstrings for a dual-cord closure, or thread a single long drawstring through both casings from opposite sides if your design allows for a single cord closure.
Fabric Selection and Preparation

Choosing the right fabric is a cornerstone of creating a durable and attractive drawstring bag. The material not only influences the bag’s longevity and functionality but also its overall aesthetic. This section will guide you through selecting suitable fabrics and preparing them for a successful sewing project.When selecting fabric for your drawstring bag, consider the intended use and desired appearance.
Different materials offer unique advantages in terms of durability, drape, and ease of care. Understanding these properties will help you make an informed choice.
Fabric Properties for Drawstring Bags
Different fabrics lend themselves well to drawstring bags due to their specific characteristics. Cotton, canvas, and polyester are popular choices, each offering distinct benefits.
- Cotton: Cotton is a versatile and breathable natural fiber. For drawstring bags, medium-weight cottons like quilting cotton or poplin are excellent choices. They are easy to sew, come in a vast array of colors and prints, and are generally washable. However, 100% cotton can wrinkle and may shrink if not pre-washed.
- Canvas: Canvas is a sturdy, tightly woven fabric known for its exceptional durability. It’s ideal for heavier-duty drawstring bags, such as those intended for carrying groceries, gym gear, or heavier items. Canvas can be made from cotton, linen, or synthetic fibers. It holds its shape well but can be stiffer and harder to sew than lighter cottons.
- Polyester: Polyester is a synthetic fabric that is known for its strength, wrinkle resistance, and water-repellent properties. It’s a good option for bags that need to withstand moisture or frequent use. Polyester blends can offer a balance of softness and durability. It generally doesn’t shrink and is easy to care for.
Fabric Preparation Best Practices
Before you begin cutting and sewing, it is crucial to prepare your fabric properly. This step ensures that your finished drawstring bag will not shrink or warp after its first wash and will lie smoothly during the sewing process.Pre-washing and ironing are essential steps in fabric preparation. Pre-washing mimics the first wash the finished item will undergo, preventing unexpected shrinkage later.
Ironing ensures a flat surface for accurate cutting and sewing.
- Pre-washing: Always pre-wash your fabric according to the manufacturer’s instructions or the intended washing method for your finished bag. This removes sizing agents, excess dyes, and allows for any potential shrinkage to occur before you cut your pattern pieces. Use the same water temperature and detergent you would use for the finished bag.
- Drying: Tumble dry on a medium setting or hang to dry, depending on the fabric type. For natural fibers like cotton, it’s often best to remove them while slightly damp to minimize deep wrinkles.
- Ironing: Once dry, press your fabric thoroughly with a hot iron. Use a pressing cloth for delicate fabrics or dark colors to prevent scorching or shine. Ensure all wrinkles are removed for precise cutting.
Fabric Weight and Drape Considerations
The weight and drape of a fabric significantly impact the look and functionality of your drawstring bag. These factors determine how the bag will hang, how well it will hold its shape, and what kind of items it can comfortably carry.When choosing materials, think about how the fabric will behave when it’s not being held. A fabric with a good drape will create a softer, more fluid bag, while a stiffer fabric will result in a more structured bag.
- Fabric Weight: Fabric weight is typically measured in ounces per square yard (oz/yd²) or grams per square meter (gsm). Lighter fabrics (e.g., quilting cotton, about 4-5 oz/yd²) are suitable for smaller, decorative bags or those intended for lightweight items. Medium-weight fabrics (e.g., denim, twill, 6-10 oz/yd²) offer a good balance of durability and ease of sewing for everyday use. Heavy-weight fabrics (e.g., upholstery fabric, canvas, 10 oz/yd² and up) are best for very durable bags designed to carry substantial weight.
- Fabric Drape: Drape refers to how a fabric hangs. Fabrics with a fluid drape, like rayon or some lighter cottons, will create a bag that folds and gathers softly. Fabrics with a stiff drape, like heavy canvas or some upholstery fabrics, will result in a bag that holds its shape more rigidly. For a classic drawstring bag that gathers nicely, a fabric with a moderate to good drape is often preferred.
Fabric Preparation Checklist
To ensure you don’t miss any crucial steps, use this simple checklist before you start cutting your fabric for your drawstring bag.This checklist will help you organize your preparation process and ensure that your fabric is ready for a smooth and successful sewing experience.
- [ ] Fabric selected based on project needs (weight, drape, durability).
- [ ] Fabric washed according to care instructions.
- [ ] Fabric dried appropriately.
- [ ] Fabric ironed thoroughly, ensuring all wrinkles are removed.
- [ ] Fabric is oriented correctly (grainline) before cutting.
Measuring and Cutting Fabric
Accurate fabric measurement and cutting are fundamental to creating a well-constructed drawstring bag. This stage ensures that your bag will have the intended dimensions and that all pieces will fit together seamlessly during the sewing process. Taking your time here will prevent frustration later on and result in a professional-looking finished product.Before you begin cutting, it’s crucial to understand how your chosen dimensions translate into fabric pieces.
This involves considering the finished size of the bag and incorporating allowances for seams and hems. The following sections will guide you through this precise process.
Bag Body Dimensions and Seam Allowances
The main body of the drawstring bag requires two identical rectangular pieces. The dimensions of these rectangles will determine the finished width and height of your bag. When measuring, always add extra fabric for seam allowances, which are the extra strips of fabric along the edges that are sewn together. A standard seam allowance for most sewing projects, including drawstring bags, is typically 1/2 inch (1.27 cm) or 5/8 inch (1.59 cm).For example, if you desire a finished bag that is 10 inches wide and 12 inches tall, your fabric rectangles will need to be wider and taller than these measurements.
To calculate the width, you’ll add the seam allowance to both sides: 10 inches (finished width) + 1/2 inch (left seam allowance) + 1/2 inch (right seam allowance) = 11 inches. Similarly, for the height, you’ll add allowances for the top hem and the bottom seam: 12 inches (finished height) + 1 inch (for the drawstring channel hem) + 1/2 inch (bottom seam allowance) = 13.5 inches.
Therefore, your two main bag body pieces would be 11 inches wide by 13.5 inches tall.
The formula for calculating fabric piece dimensions is:Finished Dimension + Seam Allowance(s) + Hem Allowance(s) = Fabric Piece Dimension
Drawstring Channel Piece Dimensions
The drawstring channel is a folded band at the top of the bag that allows the drawstring to pass through. This piece also requires precise measurement. The height of the channel piece is determined by how wide you want the finished channel to be, plus an additional amount for folding and securing it to the bag. A common finished channel width is 1 inch, which means the fabric piece needs to be at least 2 inches wide (1 inch for the channel and 1 inch for the fold) plus an additional 1/2 inch for attaching it to the bag body, making it 2.5 inches tall.The length of the drawstring channel piece should match the width of your bag body pieces, including the seam allowances.
Using the previous example where the bag body width was 11 inches, the drawstring channel piece would need to be 11 inches long.So, for a finished drawstring channel of 1 inch, the fabric piece would be:
inches (bag body width) x 2.5 inches (channel height + folds + attachment).
Cutting Tools: Rotary Cutter vs. Scissors
The choice of cutting tool can significantly impact the precision and ease of your fabric cutting. Both rotary cutters and fabric scissors have their advantages.
- Rotary Cutter and Mat: This combination is ideal for achieving very straight, clean cuts, especially on longer fabric edges. A rotary cutter uses a sharp, circular blade that rolls through the fabric. When used with a self-healing cutting mat and a quilting ruler, it allows for precise, one-pass cutting. This method is particularly beneficial for creating perfectly straight lines needed for bag panels and channels.
- Fabric Scissors: High-quality fabric scissors, sharpened regularly, are also excellent for cutting fabric. They offer good control, especially for smaller or curved cuts. For beginners, scissors might feel more intuitive. However, achieving perfectly straight lines on long cuts can be more challenging and may require more careful attention.
When cutting, always ensure your fabric is laid flat and smooth to avoid any distortions. For a rotary cutter, place the fabric on the mat, position the ruler along your marked cutting line, and roll the cutter firmly along the ruler’s edge. For scissors, lift the fabric slightly at the cutting line to allow for a clean cut, or use a cutting mat underneath to support the fabric and guide the scissors.
Marking Fabric for Cutting
Accurate marking is as crucial as accurate cutting. Various tools can be used depending on your fabric type and preference.
- Tailor’s Chalk or Fabric Pencil: These are excellent for marking directly onto the fabric. Tailor’s chalk leaves a temporary line that can be brushed or washed away. Fabric pencils often have erasable ink or lead that disappears with heat or water. Always test these marking tools on a fabric scrap first to ensure they are erasable and do not damage the fabric.
- Water-Soluble Pens: Similar to fabric pencils, these leave a mark that disappears with water. They can be very precise but require careful handling to avoid accidental smudging.
- Tailor’s Tacks or Thread Tracing: For more permanent marks that won’t disappear, tailor’s tacks can be created by making tiny stitches that form loops on the fabric surface. These are good for marking points but are less suitable for long lines.
When marking, ensure your lines are clear and extend slightly beyond the intended cutting line to provide a visual guide. For the drawstring channel piece, you’ll need to mark the cutting line, as well as any fold lines that will guide your pressing and sewing.
Sewing the Bag Body

Now that your fabric is precisely measured and cut, it’s time to bring your drawstring bag to life by sewing the main body. This stage involves creating the foundational structure of your bag, ensuring it’s sturdy and well-formed. We will guide you through the essential sewing techniques to achieve professional-looking seams.This section focuses on the practical application of your sewing machine to construct the bag’s body.
We’ll cover creating strong seams, reinforcing them, and preparing the fabric for the final touches.
Sewing Straight Seams
Achieving straight seams is fundamental to a neat and durable bag. Your sewing machine is designed to help you accomplish this with consistent results.To sew a straight seam:
- Thread your sewing machine with a good quality thread that matches your fabric.
- Place your fabric pieces right sides together, aligning the edges precisely.
- Set your sewing machine to a straight stitch. A stitch length of 2.5mm is generally suitable for most bag construction.
- Begin sewing at the edge of the fabric, maintaining a consistent seam allowance. A common seam allowance for bag bodies is 1/2 inch (1.27 cm) or 5/8 inch (1.59 cm), depending on your pattern or preference.
- Use the markings on your sewing machine’s presser foot or the edge of the fabric as a guide to keep your stitching line straight.
- As you sew, gently guide the fabric; do not push or pull it, as this can distort the seam.
- Continue sewing until you reach the end of the seam.
Reinforcing Seams with Backstitching
To ensure your seams can withstand the wear and tear of use, it’s crucial to reinforce them at the beginning and end. This is achieved through backstitching, a technique that essentially stitches over the same line of stitches in reverse.To backstitch:
- At the start of your seam, sew forward for about 3-4 stitches.
- Engage the reverse stitch lever or button on your sewing machine and sew backward over the initial stitches for the same distance.
- Release the reverse stitch lever and continue sewing forward to complete the seam.
- Repeat this process at the end of the seam before lifting the presser foot.
This creates a strong, secure knot that prevents the seam from unraveling.
Trimming Excess Fabric from Seams
After sewing your seams, you’ll often have excess fabric within the seam allowance. Trimming this excess can help reduce bulk, especially in areas where the fabric might be folded or turned.Methods for trimming excess fabric:
- Trimming to a standard seam allowance: If you used a wider seam allowance than necessary (e.g., 1 inch when 1/2 inch is sufficient), you can trim the excess fabric down to your desired seam allowance. For instance, if you sewed with a 5/8 inch seam allowance and want to reduce bulk, trim the seam allowance down to 1/4 inch.
- Trimming at corners: For bags with defined corners, you can clip the corners diagonally, getting very close to the stitching line without cutting through it. This allows for sharper, neater corners when the bag is turned right side out.
- Trimming bulky seams: If you are using a particularly thick fabric or multiple layers, you might consider trimming every other layer of the seam allowance or “grading” the seams. This involves trimming one side of the seam allowance slightly shorter than the other, which helps to distribute the bulk more evenly.
Always use sharp scissors or a rotary cutter for clean cuts that won’t fray excessively.
Sewing the Bottom Hem
The bottom hem of your drawstring bag provides a finished edge and reinforces the base of the bag. This is typically a double fold to encase the raw edge securely.To sew the bottom hem:
- Turn the raw bottom edge of the bag body up by 1/2 inch (1.27 cm) towards the wrong side of the fabric and press it flat.
- Turn the folded edge up again by another 1 inch (2.54 cm) towards the wrong side, enclosing the raw edge within this fold. Press this second fold firmly.
- Secure the hem by sewing close to the folded edge. You can choose to sew along the very bottom folded edge or slightly above it for a more decorative look.
- As with the side seams, remember to backstitch at the beginning and end of your hem stitching for reinforcement.
This process creates a clean, durable bottom edge for your drawstring bag.
Creating the Drawstring Casing
The drawstring casing is a crucial element of your bag, serving as the channel through which the drawstring will pass to close the bag. A well-constructed casing not only looks neat but also ensures smooth operation of the drawstring. This section will guide you through the process of creating a durable and attractive casing.The process involves precisely folding and pressing the top edge of your bag to create a channel, followed by secure stitching.
The width of this casing directly influences the type and thickness of drawstring you can use, as well as the overall aesthetic of your finished bag.
Folding and Pressing the Fabric for the Casing
To create a clean and defined casing, it’s essential to prepare the fabric edge accurately. This involves a double fold, which encloses the raw edge and provides a stable foundation for stitching.Begin by pressing the top raw edge of your bag down by approximately 1/4 inch (0.6 cm). This initial fold helps to neatly tuck away the raw threads. Next, fold the edge down again, this time by the desired width of your casing.
A common casing width is 1 inch (2.5 cm), but this can be adjusted based on your preference and the intended drawstring. For a 1-inch finished casing, you would typically fold down 1 1/4 inches (3.2 cm) in total (1/4 inch initial fold + 1 inch for the casing). Press this second fold firmly with your iron to create a crisp crease.
Ensure the folded edge is even and runs parallel to the bottom edge of the bag.
Sewing the Drawstring Casing
Once the fabric is folded and pressed, it’s time to sew the casing. This step requires careful stitching to ensure the casing is strong and functional, with a vital opening left for the drawstring.Stitch close to the lower folded edge of the casing, approximately 1/8 inch (0.3 cm) away from it. This ensures that the raw edge of the fabric is securely enclosed within the casing.
When you reach a point about 1 to 1.5 inches (2.5 to 3.8 cm) from the side seam, stop stitching. Backstitch to secure the seam. Then, pivot your fabric and continue stitching along the other side seam, again stopping about 1 to 1.5 inches (2.5 to 3.8 cm) from the seam. Backstitch to secure. This creates the channel for the drawstring, leaving an unstitched opening on each side of the bag through which the drawstring can be inserted and exited.
For added durability, especially on bags that will carry heavier items, you can consider a second line of stitching along the top folded edge of the casing.
Casing Width and Drawstring Impact
The width of your drawstring casing has a direct impact on both its functionality and the types of drawstrings that can be used. A wider casing offers more room, allowing for thicker or multiple drawstrings, while a narrower casing provides a sleeker look.
- Narrow Casing (e.g., 1/2 inch or 1.3 cm finished): Best suited for thinner cords or ribbons. It creates a more delicate and refined appearance.
- Medium Casing (e.g., 1 inch or 2.5 cm finished): A versatile option that accommodates most standard drawstrings, including cotton cord, paracord, or ribbon. It provides a good balance between functionality and aesthetics.
- Wide Casing (e.g., 1.5 inches or 3.8 cm finished): Ideal for thicker ropes, braided cords, or even for using two separate drawstrings for enhanced closure. This width can add a more robust and utilitarian feel to the bag.
The choice of casing width should also consider the scale of your bag. A small coin purse might benefit from a narrower casing, while a large tote bag would likely require a wider casing to accommodate a substantial drawstring for secure closure.
Visual Description of a Well-Constructed Drawstring Casing
A well-constructed drawstring casing is characterized by its neatness, evenness, and functionality. Visually, it appears as a smooth, uniform band at the top of the bag. The stitching lines are straight and parallel, with the lower stitch line running consistently close to the bottom edge of the folded fabric, effectively hiding the raw edge. The fabric within the casing lies flat, without puckering or bunching.
The openings for the drawstring are clearly defined and of equal size on both sides, allowing for effortless threading of the cord. The casing maintains its shape, even when the bag is empty, suggesting a good press and secure stitching. The overall impression is one of quality craftsmanship, where the casing integrates seamlessly with the bag’s design.
Inserting and Finishing the Drawstring
Now that your drawstring casing is beautifully sewn, it’s time to bring your bag to life by adding the drawstring. This is the element that will allow you to easily open and close your bag, making it both functional and stylish. We’ll cover everything from choosing the right material to securely finishing the ends.
Preparing the Drawstring Material
The choice of drawstring material significantly impacts the bag’s look and feel. Whether you opt for a classic cord, a soft ribbon, or even a sturdy shoelace, selecting the right material will enhance the overall aesthetic and usability of your drawstring bag.
- Cord: Cotton, nylon, or polyester cords are excellent choices. They offer durability and a smooth glide through the casing. Consider the thickness; a cord that is too thin might cut into the fabric, while one that is too thick could be cumbersome.
- Ribbon: Satin or grosgrain ribbons add a touch of elegance. Ensure the ribbon is sturdy enough not to fray easily and is wide enough to be comfortable to pull.
- Fabric Strips: You can create your own drawstring by cutting fabric strips and twisting them together or folding and sewing them into a cord. This allows for a perfect match with your bag fabric.
- Shoelaces: For a more casual or sporty look, sturdy shoelaces can be a fun and readily available option.
Threading the Drawstring
Getting the drawstring through the casing is a straightforward process with the right tools. A safety pin or a bodkin acts as your guide, ensuring the drawstring is pulled evenly and without frustration.
To begin threading, attach one end of your chosen drawstring material securely to the eye of a safety pin or a bodkin. Open the safety pin, thread the drawstring through it, and then close the pin tightly around the drawstring. If using a bodkin, thread the drawstring through its loop and secure it.
Next, insert the pinned end of the drawstring into one of the openings of your sewn casing. Gently push the safety pin or bodkin through the channel of the casing, following the path you created. Continue to guide it along until it emerges from the other opening of the casing. Once the drawstring is fully threaded, carefully remove the safety pin or bodkin.
Tying Off Drawstring Ends
Securing the ends of your drawstring is crucial for preventing it from pulling out of the casing and for creating a comfortable grip. There are several effective methods to achieve this.
A common and simple method is to tie a knot at each end of the drawstring. For a neat finish, consider tying a stopper knot, such as a figure-eight knot or an overhand knot. Alternatively, you can melt the ends of synthetic cords or ribbons with a lighter to prevent fraying and create a small, hardened bead. For fabric strips, you can sew the ends together or tie them in a decorative knot.
“A well-tied knot not only secures the drawstring but also adds a finished detail to your bag.”
Ensuring Smooth Drawstring Movement
For optimal functionality, the drawstring should glide effortlessly through the casing. Several factors contribute to this smooth operation.
- Material Choice: As mentioned earlier, materials like nylon or polyester cords generally offer the best glide. Silky ribbons can also be very smooth.
- Casing Size: Ensure the casing is slightly wider than your drawstring material. If the casing is too tight, the drawstring will snag.
- Seam Allowance: When sewing the casing, make sure the raw edges are tucked in neatly. Any bulky threads or uneven seams inside the casing can impede movement.
- Lubrication (Optional): For extremely tight casings or stiff materials, a very small amount of beeswax or a silicone-based fabric treatment applied to the drawstring can help it slide more easily. Use this sparingly to avoid staining the fabric.
Customization and Embellishments
Once you have successfully sewn your basic drawstring bag, the true fun begins with personalization! This stage allows you to transform a functional item into a unique accessory that reflects your style or serves a specific purpose. We will explore various methods to add flair and individuality to your creation, making it stand out from the crowd.From artistic touches to practical additions, customizing your drawstring bag is a rewarding process.
Whether you’re looking to add a pop of color, a personal message, or enhanced functionality, there are numerous avenues to explore. Let’s dive into some creative ideas to make your drawstring bag truly your own.
Fabric Paint and Marker Personalization
Fabric paints and markers offer a vibrant and accessible way to decorate your drawstring bag. These mediums are designed to adhere to fabric, providing durable and washable designs. You can create anything from simple patterns and motifs to intricate illustrations and personalized text.To achieve the best results:
- Ensure your fabric is clean and dry before applying any paints or markers.
- If using fabric markers, sketch your design lightly with a pencil first.
- For fabric paints, consider using stencils for clean lines and repeating patterns.
- Allow ample drying time for both paints and markers according to the manufacturer’s instructions.
- Heat-setting the design (usually with an iron) is often recommended to ensure longevity and washability. Always check the product’s specific instructions for heat-setting.
Fabric paints and markers are excellent for adding a personal touch, such as initials, favorite quotes, or themed designs for special occasions like birthdays or holidays.
Adding Patches and Appliques
Patches and appliques are fantastic for adding texture, dimension, and visual interest to your drawstring bag. Patches can be iron-on or sew-on, while appliques are typically sewn onto the fabric. This method is ideal for incorporating pre-made designs or creating your own fabric motifs.When attaching patches and appliques:
- For iron-on patches, follow the manufacturer’s instructions carefully regarding temperature and pressing time. Ensure the fabric can withstand the heat.
- Sew-on patches and appliques offer greater durability and can be attached using a sewing machine or by hand.
- Consider the placement of your patch or applique to ensure it doesn’t interfere with the bag’s opening or drawstring channels.
- For appliques, you can cut shapes from contrasting fabrics and sew them onto the bag. Edges can be left raw for a frayed look or finished with a zig-zag stitch for a cleaner appearance.
This technique is perfect for showcasing interests, hobbies, or creating a bohemian and layered aesthetic.
Incorporating Different Handle and Strap Types
While the standard drawstring acts as a strap, you can enhance the bag’s functionality and style by adding alternative handles or straps. This can include making the bag more comfortable to carry or allowing for different carrying positions.Explore these options for handles and straps:
- Rope Handles: Thicker, braided ropes can be threaded through the casing or attached to grommets for a nautical or rugged look.
- Webbing Straps: Durable nylon or cotton webbing can be sewn onto the bag’s sides to create shoulder straps or backpack-style straps.
- Leather Straps: For a more luxurious feel, consider adding leather straps, either short handles or longer adjustable ones. These can be attached with rivets or by sewing.
- Chain Straps: A decorative metal chain can add an element of glamour, attached securely to the bag’s sides.
- Detachable Straps: Using swivel clasps and D-rings allows for the attachment and detachment of various strap types, offering versatility.
The choice of handle or strap will significantly influence the bag’s overall aesthetic and how it’s used.
Adding Internal Pockets and Dividers
Enhancing the interior of your drawstring bag with pockets and dividers can greatly improve its organization and utility. This is especially beneficial for keeping smaller items secure and easily accessible.Methods for adding internal organization include:
- Simple Slip Pockets: Cut a rectangle of fabric, fold and press the top edge, and then sew it to the inside of the bag before completing the main construction.
- Zipper Pockets: For added security, you can insert a zipper pocket. This involves creating a separate pocket unit and sewing it into the bag’s lining or main fabric.
- Dividers: To create compartments, sew vertical strips of fabric to the inside of the bag, effectively dividing the space. These can be simple fabric panels or more structured dividers.
- Elasticated Pockets: Sew a strip of elastic along the top edge of a pocket to create a snug fit that holds items securely.
Adding internal pockets transforms your drawstring bag from a simple carry-all into a highly functional organizer for everyday essentials, travel, or specific hobbies.
Troubleshooting Common Sewing Issues
Even with the best preparation, sewing projects can sometimes present challenges. This section is dedicated to helping you navigate and resolve common issues that might arise while constructing your drawstring bag, ensuring a smooth and enjoyable crafting experience.
Skipped Stitches
Skipped stitches are a common frustration, resulting in gaps in your seams. This typically occurs when the needle and the bobbin thread are not interacting correctly. Several factors can contribute to this, and addressing them systematically will help restore consistent stitching.To fix skipped stitches, consider the following:
- Needle Issues: Ensure you are using the correct type and size of needle for your fabric. A bent, dull, or incorrect needle can easily cause skipped stitches. Replace the needle if it appears damaged or if you haven’t changed it recently.
- Thread Problems: Verify that your thread is properly threaded through the machine, including the tension discs and guides. Also, check the quality of your thread; old or poor-quality thread can break or tangle, leading to skipped stitches.
- Machine Tension: The upper thread tension and bobbin tension might be unbalanced. Consult your sewing machine manual to learn how to adjust these settings. Generally, increasing the upper tension slightly or decreasing the bobbin tension can resolve this.
- Bobbin Case: Ensure the bobbin is wound evenly and inserted correctly into the bobbin case. A poorly wound or incorrectly seated bobbin is a frequent culprit.
Fabric Bunching or Puckering
Fabric bunching or puckering during sewing creates an unsightly, gathered effect on your seams. This usually indicates that the fabric is being pushed or pulled unevenly through the machine, or that the tension is too high.Solutions for fabric bunching and puckering include:
- Presser Foot Pressure: Some sewing machines have adjustable presser foot pressure. If the pressure is too high, it can crush the fabric. Reduce the pressure if your machine allows.
- Feed Dogs: Ensure the feed dogs (the teeth under the presser foot that move the fabric) are engaged and clean. Dirty or disengaged feed dogs won’t move the fabric consistently.
- Tension Adjustment: Similar to skipped stitches, incorrect tension can cause puckering. If the upper tension is too tight, it can pull the fabric upwards. Try loosening the upper tension.
- Stitch Length: A stitch length that is too short can also contribute to puckering, especially on lighter fabrics. Experiment with a slightly longer stitch length.
- Stabilizers: For very delicate or stretchy fabrics, using a stabilizer underneath can provide support and prevent bunching.
Uneven Seams
Uneven seams can make a finished project look unprofessional. This issue often arises from inconsistent fabric feeding, improper guiding of the fabric, or variations in stitch length.To address uneven seams, follow these steps:
- Consistent Fabric Feeding: Practice feeding the fabric smoothly and consistently. Avoid pushing or pulling the fabric; let the machine’s feed dogs do the work.
- Guide the Fabric: Use seam guides on your sewing machine’s needle plate or tape to ensure you maintain a consistent seam allowance.
- Stitch Length: Ensure your stitch length is set correctly for the fabric you are using. An inconsistent stitch length will result in an uneven seam.
- Machine Maintenance: Regularly clean and oil your sewing machine. Lint and debris can interfere with the smooth operation of the feed dogs and other mechanisms, leading to uneven stitching.
Drawstring Casing Issues
A drawstring casing that is too tight or too loose can affect the functionality and appearance of your bag. This often happens during the construction phase if measurements are not precise or if the casing is not sewn correctly.Here are solutions for drawstring casing problems:
- Too Tight Casing: If the casing is too tight, the drawstring will not slide freely, or it might be difficult to thread. This can occur if the folded edge for the casing was too narrow, or if the stitching line was too close to the raw edge. To fix this, you might need to carefully unpick the stitching and re-sew the casing with a slightly wider fold, ensuring there is ample space for the drawstring.
Alternatively, if the fabric is forgiving, you might be able to gently stretch the casing open a little.
- Too Loose Casing: A casing that is too loose can cause the drawstring to get tangled or slip out. This typically happens if the fold for the casing was too wide, or if the stitching line was too far from the raw edge. The solution here involves unpicking the casing and re-sewing it with a narrower fold, ensuring the stitching is closer to the raw edge.
Always measure your drawstring width and add a little extra room before cutting your fabric for the casing.
- Ensuring Proper Casing Width: When preparing your fabric for the casing, remember to fold it over twice. The first fold should be just wide enough to encase the raw edge, and the second fold should be wide enough to accommodate your drawstring plus a little extra ease. Measure your drawstring and add approximately 1/4 inch (0.6 cm) for smooth movement.
Variations and Advanced Techniques

Beyond the basic drawstring bag, there are numerous ways to enhance its functionality, aesthetics, and construction. This section explores several popular variations and advanced techniques that can elevate your sewing skills and create more sophisticated drawstring bags.
Lined Drawstring Bag Construction
Adding a lining to your drawstring bag provides a more polished finish, hides raw edges, and can add an extra layer of durability or opacity. The process is similar to making a basic bag, but with an additional set of fabric pieces for the lining.Here’s a guide to creating a lined drawstring bag:
- Cut Fabric: Cut two pieces for the outer bag and two pieces for the lining, all to the same dimensions as your main bag pattern.
- Prepare Lining: If your lining fabric is prone to fraying, consider finishing the raw edges with a serger or a zigzag stitch.
- Sew Outer Bag: Assemble the outer bag as you normally would, leaving the top edge open.
- Sew Lining Bag: Assemble the lining bag similarly, but leave a 3-4 inch opening along one of the side seams. This opening will be used to turn the bag right side out.
- Attach Lining to Outer Bag: Place the outer bag inside the lining bag, with the right sides of both fabrics facing each other. Align the top raw edges and pin them together securely.
- Sew Top Edges: Stitch around the entire top edge, joining the outer bag and the lining.
- Turn Right Side Out: Carefully pull the outer bag through the opening you left in the lining seam.
- Close Lining Opening: Once the bag is turned, use a slip stitch or a topstitch to close the opening in the lining.
- Topstitch and Create Casing: Push the lining down inside the outer bag. Topstitch around the top edge of the bag, about 1/4 inch from the seam. This will enclose the raw edges and create a neat finish. Then, proceed to create the drawstring casing as you would for a single-layer bag, ensuring your stitches go through both the outer fabric and the lining.
Round-Bottom Drawstring Bag Adaptation
A round bottom offers a different silhouette and can be more stable for standing upright. Adapting a standard rectangular pattern to include a round bottom involves creating a separate circular piece for the base.To adapt your pattern for a round-bottom drawstring bag:
- Determine Bottom Diameter: Decide on the desired diameter for the base of your bag.
- Cut Bottom Circle: Cut a circle from your fabric using the chosen diameter. Remember to add your seam allowance to this measurement if you are not using a pattern piece that already includes it.
- Calculate Side Panel Height: The height of your side panels will be the desired bag height minus the radius of your bottom circle.
- Prepare Side Panels: Cut your side panels to the calculated height and the desired width for the circumference of your bag, plus seam allowance.
- Attach Bottom to Sides: Pin the bottom circle to the bottom edges of the side panels. You will need to ease the fabric of the side panels to fit the curve of the circle. Stitch them together carefully, ensuring a smooth attachment.
- Sew Side Seam: Once the bottom is attached, sew the side seam of the bag body to form a continuous loop.
- Construct Casing: Proceed to create the drawstring casing at the top of the bag as usual.
Zipper Pocket Integration
Adding a zipper pocket provides a secure place to store small items. This can be integrated into the lining of the bag for a clean look.Steps for adding a zipper pocket:
- Prepare Pocket Piece: Cut a rectangle of fabric for your pocket. The width should be slightly wider than your zipper length, and the height should be sufficient for your desired pocket depth.
- Mark Zipper Opening: On the lining piece for your bag, mark the placement and size of your zipper opening. This is typically a horizontal rectangle.
- Install Zipper: Follow standard zipper installation techniques. This usually involves stitching the pocket fabric to the lining around the marked opening, then carefully cutting out the opening and folding the pocket fabric to the inside. The zipper is then stitched in place.
- Attach Lining: Once the zipper pocket is installed on the lining piece, you can then proceed with assembling the lined bag as described earlier. The pocket will be accessible from the outside of the bag when it’s finished.
Alternative Closure Methods
While a simple drawstring is classic, other closure methods can offer different aesthetics and levels of security.Consider these alternative closure techniques:
- Toggle or Cord Lock: Instead of tying the drawstring, a toggle or cord lock can be used to cinch the bag closed. This is particularly useful for bags that need to be opened and closed frequently.
- Magnetic Snap: For a cleaner look and quick access, a magnetic snap can be sewn into the top flap or directly onto the bag opening. This is often used in conjunction with a flap closure.
- Buckle or Clasp: For a more decorative and secure closure, various buckles or clasps can be incorporated. These might require additional hardware and a slightly modified top edge to accommodate them.
- Velcro: A simple and effective closure, Velcro can be sewn onto the top edge or a flap for easy fastening.
- Button and Loop: A classic and charming option, a button can be sewn onto one side of the opening, with a fabric loop or buttonhole on the other for closure.
Final Review
As we conclude this comprehensive exploration of How to Sew a Drawstring Bag, you are now equipped with the knowledge and confidence to create a variety of personalized and functional bags. From simple everyday carriers to more elaborate designs, the skills acquired here open doors to endless creative possibilities. Embrace the satisfaction of crafting something unique and practical with your own hands, ready to be used or gifted.