How to Sew Scalloped Edges sets the stage for this enthralling narrative, offering readers a glimpse into a story that is rich in detail with formal and friendly language style and brimming with originality from the outset.
Embark on a delightful journey into the art of sewing scalloped edges, a charming technique that adds a touch of elegance and whimsy to a wide array of sewing projects. From enhancing the allure of garments to gracing home decor items, understanding the nuances of creating these decorative curves can elevate your crafting skills. This guide will illuminate the aesthetic appeal, practical applications, and the satisfying process of mastering this beautiful sewing detail, ensuring your creations stand out with a distinctive and polished finish.
Introduction to Scalloped Edges

Scalloped edges offer a charming and elegant finishing touch to a wide array of sewing projects, adding a decorative flair that is both classic and versatile. Their gentle curves and rounded indentations evoke a sense of softness and sophistication, making them a popular choice for garments, home decor, and craft items.The fundamental concept of creating a scalloped edge involves marking and then carefully cutting a series of repeating curves or arcs along the raw edge of fabric.
These arcs can vary in size and depth, allowing for a spectrum of aesthetic possibilities, from subtle waves to pronounced, decorative scallops. This technique transforms a simple, functional edge into a deliberate design element.Learning to sew scalloped edges provides sewers with a valuable skill that can elevate the appearance of their creations significantly. It opens up a world of creative possibilities, enabling the addition of unique and polished details to various crafts.
Aesthetic Appeal and Common Uses
The aesthetic appeal of scalloped edges lies in their inherent softness and decorative quality. They provide a visually pleasing alternative to a straight hem or a simple bias binding, introducing a touch of visual interest and a delicate, often vintage, charm.Scalloped edges are frequently employed in a variety of sewing applications:
- Apparel: They are commonly found on the hems of skirts, dresses, blouses, and sleeves, particularly in children’s wear and historical reproductions. They can also be used on necklines, cuffs, and collars for an added decorative flourish.
- Home Decor: Tablecloths, placemats, valances, curtains, and decorative pillows often feature scalloped edges to enhance their visual appeal and create a more finished, artisanal look.
- Accessories: Scarves, bags, and even fabric book covers can benefit from the distinctive look of a scalloped edge.
- Craft Projects: In quilting, appliqué, and other fabric crafts, scalloped edges can be used as decorative borders or as part of the overall design.
Basic Concept of Creating a Scalloped Edge
The creation of a scalloped edge fundamentally relies on defining a pattern of repeating curves and then accurately cutting the fabric along this pattern. This process can be achieved through several methods, each with its own nuances. The core idea is to establish a series of convex and concave arcs that flow into one another, forming a continuous, decorative border.This can be visualized as drawing a series of connected semi-circles or quarter-circles along the fabric’s edge.
The consistency in the size and spacing of these curves is key to achieving a professional and pleasing result.
Advantages of Learning to Sew Scalloped Edges
Acquiring the skill of sewing scalloped edges offers numerous benefits for individuals engaged in sewing and crafting. It is a technique that, once mastered, can be applied across a broad spectrum of projects, enhancing their visual appeal and perceived value.The advantages include:
- Enhanced Project Aesthetics: Scalloped edges provide a sophisticated and decorative finish that can transform a basic sewing project into a more elaborate and eye-catching piece.
- Versatility: The technique is adaptable to various fabrics, from lightweight cottons to heavier linens, and can be customized in terms of scallop size, depth, and spacing to suit different design requirements.
- Creative Expression: It allows for greater creative freedom, enabling sewers to impart a unique and personalized touch to their creations, differentiating them from mass-produced items.
- Skill Development: Learning to sew scalloped edges refines fine motor skills, precision in cutting and stitching, and an understanding of fabric handling, all of which contribute to overall sewing proficiency.
- Cost-Effectiveness: For decorative trims or unique edgings, creating scalloped edges at home can be more economical than purchasing specialized trims or custom-made items.
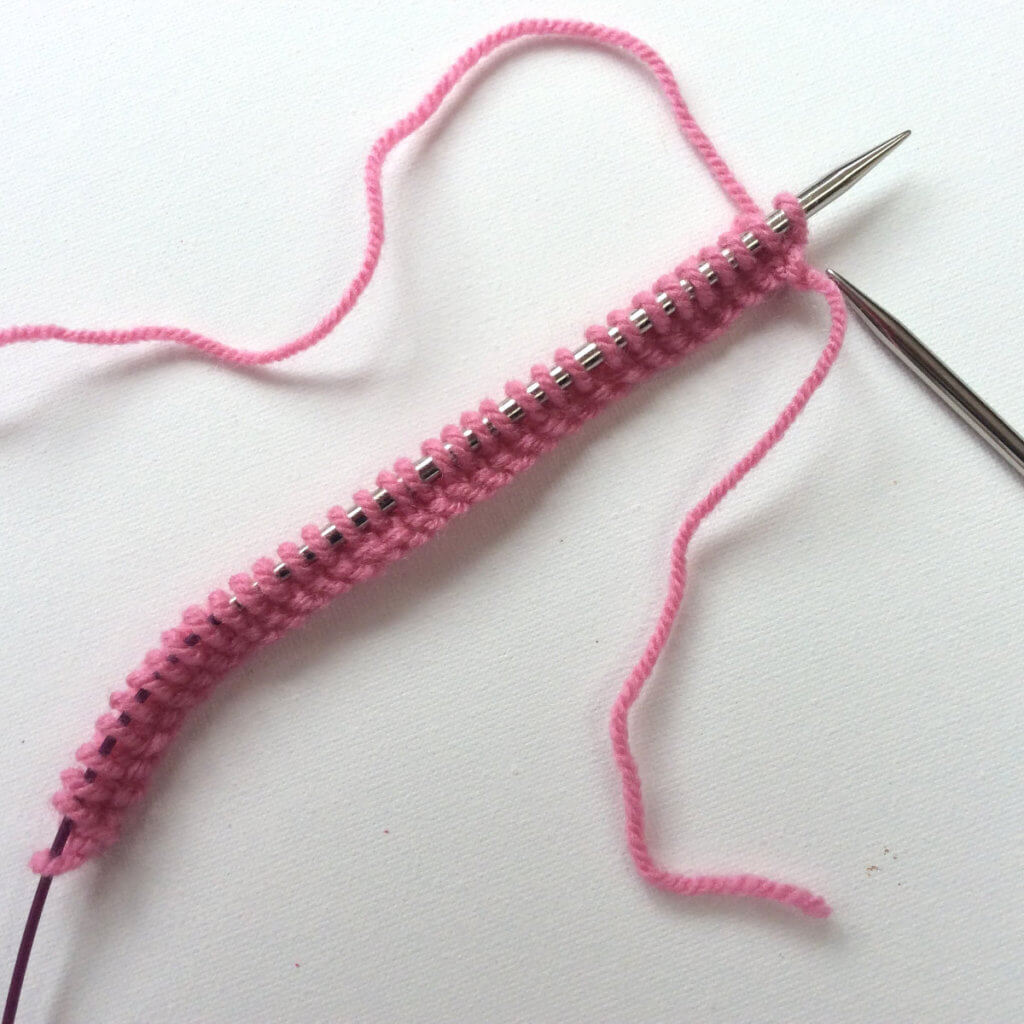
Essential Tools and Materials
To successfully create beautiful scalloped edges, having the right tools and materials is paramount. These elements not only make the process smoother but also contribute significantly to the final aesthetic of your project. From precise marking to the selection of appropriate fabrics, each component plays a vital role in achieving a professional and polished finish.Selecting the correct tools and materials ensures accuracy and ease throughout the sewing process.
This section will guide you through the essential items you’ll need, focusing on their specific functions and benefits for scalloped edge creation.
Sewing Tools for Scalloped Edges
A well-equipped sewing kit is the foundation for any successful sewing project, and creating scalloped edges is no exception. The following tools are indispensable for achieving neat, precise, and attractive scalloped finishes.
- Sewing Machine: Essential for stitching the scalloped edge securely. A machine with adjustable stitch width and length will offer more control.
- Sharp Fabric Scissors: Crucial for accurately cutting out the scallops and trimming excess fabric. Investing in high-quality, sharp scissors will prevent fabric fraying and ensure clean cuts.
- Rotary Cutter and Mat: An alternative to scissors for cutting, especially for very fine fabrics or when making many repetitive cuts. The rotary cutter provides a very clean edge.
- Pinking Shears: These shears have a serrated edge that cuts a zigzag pattern. While not for creating the initial scallop shape, they are excellent for finishing raw edges to reduce fraying within the curves, particularly on fabrics that tend to unravel.
- Iron and Ironing Board: Essential for pressing seams and fabric edges. Pressing is a critical step in achieving crisp and defined scalloped edges.
- Seam Ripper: A standard sewing tool for correcting any mistakes.
- Pins or Clips: Used to hold fabric layers together, especially when preparing the edge for stitching.
- Needles: Appropriate sewing machine needles for your fabric type.
- Thread: High-quality thread that matches or complements your fabric.
Fabric Suitability for Scalloped Finishes
The type of fabric you choose will significantly impact how well your scalloped edges turn out. Some fabrics lend themselves beautifully to the curves and drape of scallops, while others can be more challenging to work with. Understanding these characteristics will help you select the best fabric for your project.Fabrics that are not too stiff nor too flimsy tend to yield the best results for scalloped edges.
The ideal fabric will hold its shape enough to define the curves clearly without being so rigid that it looks unnatural or difficult to manipulate.
- Medium-weight Cotton: A versatile choice, cotton fabrics like quilting cotton or poplin are stable, easy to press, and hold a crisp edge well. They are forgiving for beginners.
- Linen Blends: These offer a lovely drape and a natural texture. Linen blends are generally easier to handle than pure linen, which can be prone to wrinkling.
- Silk Charmeuse or Crepe de Chine: For elegant garments, these silks can create beautiful, flowing scalloped edges. However, they require more careful handling due to their slipperiness and tendency to fray.
- Rayon or Viscose: These fabrics offer a beautiful drape and a soft feel, making them excellent for garments with flowing scalloped hemlines. They can be a bit more challenging to cut and sew due to their tendency to shift.
- Lightweight Wool Blends: For more structured items like jackets or skirts, lightweight wool blends can provide a sophisticated scalloped finish that holds its form.
Fabrics to approach with caution include very stretchy knits, which can distort the scallop shape, and very sheer or slippery fabrics like chiffon, which require advanced techniques and careful handling.
Marking Tools for Fabric
Accurate marking is fundamental to creating precise and symmetrical scalloped edges. The right marking tool will ensure your guide lines are visible during the process but disappear afterward without damaging the fabric. The suitability of a marking tool depends on the fabric type, color, and the permanence of the mark needed.It is always advisable to test any marking tool on a scrap piece of your fabric in an inconspicuous area to ensure it can be removed completely.
- Tailor’s Chalk: A traditional marking tool available in various colors. It provides a temporary line that can be brushed or washed away. It works well on most fabrics but can leave a faint residue on very dark or textured materials.
- Fabric Marking Pencils: These pencils offer a finer line than chalk and are suitable for more detailed marking. They are often erasable or washable.
- Water-Soluble Fabric Markers: These markers create a clear line that disappears when exposed to water. They are excellent for temporary markings and are often used on lighter-colored fabrics. Ensure the fabric is not too absorbent, as the ink might spread.
- Air-Erasable Fabric Markers: These markers leave a line that fades on its own after a period, typically a few hours to a couple of days, depending on air exposure. They are convenient for projects where you don’t want to use water.
- Chalk Wheels/Dispensers: These tools dispense fine chalk powder onto the fabric, creating a precise and continuous line. They are particularly useful for drawing curved lines like scallops.
- Tracing Wheel and Carbon Paper: This method involves using a sharp-edged wheel to transfer a line from a pattern onto the fabric, using a layer of carbon paper in between. It creates a precise, albeit sometimes permanent, line that is good for dark fabrics where chalk might not show.
For creating the scallop pattern itself, a ruler and a compass or a round object of the desired diameter can be used in conjunction with these marking tools to draw the initial curves.
Methods for Creating Scalloped Edges
Creating beautiful scalloped edges on your fabric projects can be achieved through several distinct methods, each offering its own advantages in terms of precision, ease of use, and the final aesthetic. Understanding these different approaches will empower you to choose the best technique for your specific project and skill level. We will explore drawing and cutting freehand, utilizing templates for uniformity, and employing specialized sewing machine tools.The choice of method often depends on the desired consistency, the complexity of the scallop shape, and the time available for the project.
While freehand offers artistic freedom, templates and specialized tools provide reliable accuracy, making them ideal for projects where perfect symmetry is paramount.
Freehand Method for Drawing and Cutting Scallops
The freehand method relies on your artistic eye and steady hand to draw and cut the scalloped pattern directly onto the fabric. This approach allows for unique and organic shapes, perfect for decorative accents where slight variations add character.To begin, mark your desired scallop placement on the wrong side of the fabric using a fabric marker or chalk. You can sketch a single scallop and then use it as a guide, or draw the entire edge freehand.
For the cutting, use sharp fabric scissors or a rotary cutter with a mat. It is crucial to cut precisely along your drawn lines. For a cleaner finish, especially on curved edges, it’s often beneficial to clip small notches into the seam allowance of the scallops before turning.
Template Method for Consistent Scalloped Shapes
For projects requiring perfectly uniform scallops, the template method is highly recommended. This involves creating or purchasing a template of your desired scallop shape, which then serves as a guide for both drawing and cutting.Templates can be made from sturdy cardstock, plastic, or even cardboard. Simply trace the template onto your fabric, ensuring it is positioned accurately for each scallop.
After tracing, cut along the traced lines. This method guarantees that every scallop will be identical in size and shape, resulting in a professional and polished finish. Many crafters also find it helpful to use a temporary adhesive spray to hold the template in place while tracing, preventing slippage.
Specialized Tools or Presser Feet for Creating Scallops
Sewing machines offer specialized tools that can simplify the creation of scalloped edges, particularly for those who prefer a machine-stitched finish. These often come in the form of presser feet designed to guide the fabric along a specific stitch pattern.One common type is a scalloped edge presser foot, which has a guide or a specific groove that helps create the curve of the scallop as you sew.
Some machines also have built-in decorative stitches that can mimic scalloped patterns. For these, you would select the appropriate stitch and guide the fabric according to the machine’s instructions, often using a standard presser foot or a specialized one designed for decorative stitching.
Comparison of Freehand, Template, and Specialized Tool Methods
Each method for creating scalloped edges offers a unique balance of accuracy and ease of use, catering to different project needs and crafter preferences.A comparison of these methods reveals the following:
- Freehand Method:
- Accuracy: Varies based on the skill of the crafter; can be less precise for beginners.
- Ease of Use: Requires artistic skill and a steady hand; no special tools needed beyond basic marking and cutting implements.
- Best For: Projects where a unique, organic, or artistic look is desired; quick decorative touches.
- Template Method:
- Accuracy: High; ensures perfect uniformity and consistency across all scallops.
- Ease of Use: Relatively easy; requires tracing and cutting skills.
- Best For: Projects demanding precise symmetry, such as quilting borders, home decor items, or garments where consistent design is important.
- Specialized Tools/Presser Feet:
- Accuracy: High; designed for machine precision and repeatability.
- Ease of Use: Can be very easy once the machine is set up and the technique is understood; requires familiarity with sewing machine functions.
- Best For: Efficiently creating uniform scallops on a variety of fabrics, especially for production sewing or when a quick and clean machine-stitched edge is preferred.
In essence, the freehand method offers creative freedom, the template method ensures absolute consistency, and specialized tools provide efficient, machine-guided precision. Your choice will ultimately depend on the desired outcome and your comfort level with different crafting techniques.
Step-by-Step Sewing Procedures

Having explored the essential tools and various methods for creating scalloped edges, we now delve into the practical, step-by-step sewing procedures. This section will guide you through preparing your fabric, accurately marking and cutting your chosen scallop design, and executing the sewing process with precision for a beautiful and durable finish. We will cover both single-fold and double-fold hem techniques, ensuring you have the knowledge to tackle different project requirements.
Mastering the sewing process is crucial for achieving professional-looking scalloped edges. The following steps are designed to be clear and actionable, allowing you to confidently transform a raw fabric edge into an elegant scalloped finish.
Fabric Edge Preparation Before Sewing Scallops
Proper preparation of the fabric edge is a foundational step that ensures your scallops are neat and even. This involves stabilizing the edge and making it ready for accurate marking and cutting.
- Pre-washing and Drying: Always pre-wash and dry your fabric according to its care instructions. This step accounts for any shrinkage that might occur after the garment or item is completed, preventing distortion of the scallops.
- Ironing: Press the fabric thoroughly to remove all wrinkles. A smooth surface is essential for accurate marking and cutting.
- Stabilizing (Optional but Recommended): For very lightweight or slippery fabrics, consider applying a lightweight interfacing or a temporary spray adhesive to the wrong side of the fabric along the edge. This adds stability and prevents stretching or distortion during the marking and sewing process.
- Defining the Hemline: Determine the finished depth of your scallop. Measure this distance from the raw edge and mark a straight line on the wrong side of the fabric. This line will serve as your sewing guide.
Marking and Cutting the Scallop Pattern
Accurate marking and cutting are paramount to achieving a symmetrical and well-defined scallop pattern. This step requires precision and attention to detail.
To begin, ensure your fabric is laid flat and smooth on a cutting surface. You can use various tools and techniques to transfer your chosen scallop design onto the fabric.
- Using a Template: The most consistent method is to create or purchase a template for your desired scallop shape. This can be made from cardstock, clear plastic, or even a piece of sturdy cardboard.
- Transferring the Design: Place the template onto the wrong side of your fabric, aligning it with the marked hemline. Use a fabric marker, chalk, or a pencil that will not show on the right side of the fabric to trace around the template. For continuous scallops, position the template so that the edge of one scallop meets the starting point of the next, ensuring even spacing and smooth transitions.
- Cutting the Scallops: Once the pattern is fully traced, carefully cut along the traced lines using sharp fabric scissors or a rotary cutter and mat. It is crucial to cut precisely along the marked lines for a clean and uniform scallop edge. For curves, use smooth, controlled cuts.
Techniques for Sewing Along a Curved or Scalloped Line
Sewing along a curved or scalloped line requires a different approach than stitching a straight seam. The key is to guide the fabric gently and adjust your speed to maintain accuracy.
When sewing your marked scallops, it’s important to handle the fabric with care to avoid stretching or puckering. The following techniques will help you achieve a smooth and professional result.
- Machine Settings: Use a slightly shorter stitch length than you normally would for straight seams. This helps to reinforce the curves and prevent them from stretching out. A stitch length of 1.5 to 2.0 mm is often suitable.
- Needle Position: Position your needle so that it just kisses the edge of the marked scallop line. Some sewing machines have adjustable needle positions, which can be very helpful.
- Guiding the Fabric: Do not force or pull the fabric. Instead, gently guide it with your hands, allowing the feed dogs of the sewing machine to do the work. For sharp curves, you may need to stop with the needle down, lift the presser foot, pivot the fabric, and then continue sewing.
- Sewing the Scallop Curve: Stitch slowly and deliberately along the marked line. For rounded scallops, keep the fabric moving smoothly. For points or inward curves, you will need to pivot the fabric at the apex of the point or the deepest part of the curve, ensuring the needle is down in the fabric before lifting the presser foot.
- Reinforcing Start and End: Backstitch at the beginning and end of your stitching line to secure the threads.
Trimming and Finishing Steps for a Clean Scalloped Edge
After sewing the scallop line, trimming and finishing are critical steps to ensure a crisp and professional appearance. This stage involves carefully removing excess fabric and preparing the edge for pressing.
The goal here is to reduce bulk and create clean lines that will define the scallop shape beautifully. Precise trimming is essential for a neat final look.
- Trimming Excess Fabric: Using sharp fabric scissors, carefully trim away the excess fabric from the raw edge, leaving a small seam allowance (typically 1/8 to 1/4 inch or 3-6 mm) inside the stitched line. Be careful not to cut into your stitching.
- Clipping Curves and Corners: For outward curves, clip small notches into the seam allowance. For inward curves, clip V-shaped notches. These clips allow the fabric to lie flat when turned. For pointed scallops, trim the seam allowance diagonally towards the point, being careful not to cut through the stitching at the tip.
- Pinking Shears (Optional): For fabrics that tend to fray easily, using pinking shears on the raw edge after trimming can help reduce fraying, although it’s not a substitute for proper finishing.
- Turning the Scallop: Carefully turn the fabric right side out. Use a point-turning tool, a chopstick, or the tip of your seam ripper (used gently) to push out the curves and points of the scallops. Ensure each scallop is well-defined and sharp.
Tips for Turning and Pressing a Scalloped Hem
Turning and pressing are the final crucial steps that bring your scalloped edge to life, giving it shape and a polished finish. Proper technique here makes all the difference.
The way you turn and press your scalloped hem will significantly impact its final appearance. Take your time and use the right tools for a professional result.
- Gentle Turning: As mentioned, use a tool to gently push out the curves and points. Avoid pulling or stretching the fabric, which can distort the shape.
- Initial Pressing: Lightly press the turned edge to set the shape. Use the tip of your iron to define the curves and points. For outward curves, press them gently rounded. For inward curves, press them crisply.
- Edge Pressing: For a very crisp edge, especially on points, you can press the seam allowance towards the wrong side of the fabric before turning. This creates a clean fold line.
- Final Pressing: Once the scallops are turned and the edge is set, give the entire hem area a final, firm press. Use a pressing cloth if necessary, especially for delicate fabrics or to prevent shine. Press from the wrong side when possible to avoid flattening the scallops too much.
- Steam: Use steam judiciously during pressing. Steam can help to set the fabric and give a crisp finish, but be mindful of the fabric type.
Procedural Guide for Sewing a Double-Fold Scalloped Hem
A double-fold scalloped hem offers a more finished and durable edge, often used for garments, curtains, or decorative items. This method involves folding the fabric edge twice before stitching.
Creating a double-fold scalloped hem provides a clean finish on both the right and wrong sides of the fabric. Follow these steps for a professional result.
- Prepare the Fabric: Pre-wash, dry, and press your fabric.
- Mark the Scallop and Hemline: Determine the finished depth of your scallop. Mark the scallop pattern on the wrong side of the fabric. Then, mark a straight hemline at the desired finished depth from the raw edge.
- First Fold: Fold the raw edge of the fabric up to the marked hemline on the wrong side. Press this fold firmly.
- Mark and Cut the Scallops: With the first fold in place, trace your scallop pattern onto the fabric, ensuring the base of the scallops aligns with the folded edge. Carefully cut along the traced scallop lines.
- Second Fold: Now, fold the fabric again along the initial pressed hemline, enclosing the raw edge. The second fold should align with the bottom of the cut scallops. Press this second fold firmly. This creates a clean, double-folded edge.
- Stitch the Double Fold: Stitch along the bottom edge of the double fold, close to the folded edge. This secures the double hem.
- Sew the Scallop Edge: Carefully trim the seam allowance of the double fold to about 1/8 inch (3 mm) from the stitched line. Then, turn the fabric right side out. Use a turning tool to push out the scallops. Press the scallops firmly as described in the turning and pressing section. You may choose to topstitch along the very edge of the scallops on the right side for added definition and durability, or leave them as is for a softer finish.
Advanced Scallop Techniques and Variations
While mastering the basic scalloped edge is a fantastic achievement, the world of sewing offers exciting avenues to elevate this technique. This section delves into advanced methods that allow for greater design expression, fabric versatility, and intricate detailing, transforming simple edges into captivating features. We will explore how to achieve deeper curves, adapt techniques for challenging fabrics like knits, and integrate decorative elements for truly unique finishes.Creating more dramatic and visually impactful scalloped edges often involves adjustments to the curve’s depth and the size of the scallop itself.
These techniques require careful planning and precise execution to maintain symmetry and a clean finish.
Creating Deeper or More Pronounced Scallops
Achieving deeper or more pronounced scallops involves adjusting the radius of the curve and the distance between the scallop points. A larger radius and wider spacing will naturally create a more dramatic, elongated scallop. For extremely deep scallops, it is often beneficial to use a template or a pattern piece specifically designed for the desired curve. When cutting, ensure ample seam allowance to accommodate the turning of the fabric, especially if the fabric is thick.
Consider using a slightly lighter-weight interfacing if necessary to prevent bulk in the curved areas.To illustrate, imagine creating a deep scallop on a tablecloth. Instead of a gentle arc, you might aim for a curve that dips significantly inwards before rising again. This requires a larger cutting guide and careful pressing to ensure the curve holds its shape.
Sewing Scalloped Edges on Knit Fabrics
Sewing scalloped edges on knit fabrics presents unique challenges due to their stretch and tendency to curl. The key is to stabilize the fabric and manage its elasticity. Using a walking foot on your sewing machine can help feed the layers evenly, preventing stretching and puckering. A knit interfacing, applied to the wrong side of the fabric, can provide much-needed stability without adding stiffness.
When cutting, it’s crucial to use a rotary cutter and mat for precision, as pins can distort the knit. For the stitching itself, a narrow zigzag stitch or a serger’s overlock stitch is often ideal, as these stitches have inherent stretch.Consider sewing a scalloped edge on a knit cardigan. Without proper stabilization, the fabric might stretch unevenly during sewing, resulting in a distorted and uneven scallop.
Using a knit interfacing and a walking foot would ensure a smooth, consistent curve.
Incorporating Decorative Stitches within Scalloped Edges
Decorative stitches can add a charming and personalized touch to scalloped edges. Before sewing the final scallop, consider applying a decorative stitch along the raw edge of the seam allowance. This can be a satin stitch, a blanket stitch, or even a free-motion embroidery design that follows the curve. Once the decorative stitch is in place, you can then proceed with turning and stitching the scalloped edge as usual.
This layering of techniques creates a beautiful dimensional effect.For example, on a decorative pillowcase, you might first stitch a delicate floral embroidery design along the edge of the fabric. Then, you would proceed to create and sew the scalloped edge over this embroidered line, making the scallop stand out with added detail.
Creating Interlocking or Layered Scalloped Designs
Interlocking or layered scalloped designs involve creating multiple layers of scallops that overlap or connect. This can be achieved by cutting out separate scalloped shapes and then layering them onto the main fabric before stitching. Alternatively, one can create a primary scallop and then add smaller, contrasting scallops that emerge from within its curves. Precision in cutting and placement is paramount for a professional finish.Imagine designing a skirt with a hemline featuring a large scallop.
You could then add smaller, contrasting fabric scallops that peek out from the underside of the larger ones, creating a rich, layered effect. This requires careful pattern drafting to ensure the layers align correctly.
Sewing Scalloped Edges on Circular or Three-Dimensional Items
Applying scalloped edges to circular or three-dimensional items, such as bags, hats, or even lampshades, requires adapting the standard techniques to account for the curvature and structure. For circular items, the principles are similar to sewing on a flat surface, but it’s crucial to ease the fabric around the curve to prevent pleating. Notching the seam allowance at the deepest points of the scallop can help it lie flat.
For three-dimensional items, you might need to construct the scallop as a separate piece and then attach it to the item, or carefully manipulate the fabric as you sew.Consider sewing a scalloped edge onto the brim of a hat. The fabric needs to be eased gently around the circular shape, and the scallops would need to be carefully turned and pressed to maintain their form against the hat’s structure.
This might involve understitching or using a stiffening material to help the scallops hold their shape.
Troubleshooting Common Scallop Sewing Issues

Sewing scalloped edges, while beautiful, can sometimes present unique challenges. Understanding and addressing common issues proactively will ensure a polished and professional finish to your projects. This section focuses on identifying and resolving these problems, helping you achieve the desired graceful curves and sharp points.Even with careful preparation, sewing curves can lead to puckering or uneven shapes. These imperfections can detract from the overall aesthetic of your scalloped edge.
Fortunately, most of these issues can be corrected with adjustments to your sewing technique and a better understanding of fabric behavior.
Addressing Puckering and Uneven Curves
Puckering often occurs when the fabric is being pushed or pulled unevenly as you sew. Uneven curves can result from inconsistent feeding of the fabric or an improper stitch length for the fabric type.To prevent puckering, ensure your feed dogs are set correctly for your fabric and that you are not stretching the fabric as you guide it. For very delicate fabrics, consider using a walking foot to ensure even feeding.
When sewing curves, take your time and use your presser foot as a guide. Slowly pivot the fabric at small intervals, rather than trying to turn a large section at once. If puckering has already occurred, you may need to carefully unpick the stitches and re-sew, paying closer attention to fabric tension.
Managing Fraying Edges on Delicate Fabrics
Delicate fabrics, such as silk, chiffon, or fine linen, are prone to fraying, which can make sewing neat scallops difficult. The fine threads can unravel easily, creating a messy edge.To manage fraying edges on delicate fabrics, consider these approaches:
- Pre-finishing: Before cutting your scallops, you can serge the raw edge of the fabric with a fine stitch or use a pinking shears. This helps to minimize fraying during the sewing process.
- Stabilizing: For extremely delicate fabrics, a lightweight, temporary stabilizer or interfacing can be applied to the wrong side of the fabric. This provides extra body and prevents excessive fraying. Test on a scrap first to ensure it doesn’t alter the fabric’s drape.
- French Seams or Rolled Hems: For a truly finished and fray-proof edge, consider enclosing the raw edge within a French seam or using a narrow rolled hem technique specifically designed for delicate fabrics. These methods create a clean, durable edge that won’t unravel.
Achieving Sharp Points and Smooth Curves
The definition of your scallops, whether they are sharp points or gentle curves, is crucial to their visual appeal. Achieving these crisp details requires precision and the right tools.For sharp points in your scalloped design:
- Clip the Corners: When sewing a pointed scallop, it is essential to clip the fabric precisely at the point after sewing, but before turning. Make a small, V-shaped cut or a straight snip right up to, but not through, your stitching line. This allows the point to turn out cleanly.
- Use a Point Turner: A point turner tool is invaluable for gently pushing out sharp corners to create a crisp, defined point without damaging the fabric.
- Pressing: Thorough pressing after turning is key to setting the shape of sharp points.
For smooth, flowing curves:
- Small Stitches: Use a slightly shorter stitch length on curves. This allows the fabric to bend more easily and creates a smoother arc.
- Clip the Curves: For inward-facing curves, clip small notches or triangles into the seam allowance, taking care not to cut through your stitching. For outward-facing curves, snip small wedges out of the seam allowance. These clips allow the fabric to lie flat and prevent it from pulling or bunching.
- Slow and Steady: Sew curves slowly, using the edge of your presser foot as a guide. Gently ease the fabric around the curve, allowing the machine to do the work.
Application of Scalloped Edges in Projects

Scalloped edges offer a charming and distinctive finishing touch to a wide array of creative endeavors, transforming ordinary items into pieces with unique character and visual appeal. Their gentle curves and playful elegance lend themselves beautifully to both functional and decorative applications, making them a versatile technique for crafters and designers alike.This section explores the diverse ways scalloped edges can be incorporated into various projects, from personal apparel to home furnishings and stylish accessories, showcasing their adaptability and aesthetic potential.
Scalloped Edges in Garments
The application of scalloped edges on garments can elevate simple designs into statement pieces, adding a touch of vintage charm or modern whimsy. These decorative finishes are particularly effective when used to highlight specific areas of a garment, drawing the eye and enhancing its overall silhouette.Dresses and skirts often feature scalloped hemlines, creating a soft, flowing effect that complements airy fabrics.
For blouses and tops, scalloped edges can be found along necklines, cuffs, and yokes, providing a subtle yet elegant detail. Consider a summery sundress with a scalloped hem that mimics the gentle waves of the ocean, or a sophisticated blouse with a scalloped collar that adds a refined touch to professional attire. Even simple t-shirts can be given a unique flair with a scalloped bottom edge.
Scalloped Edges in Home Decor
In home decor, scalloped edges bring a sense of softness and personality to everyday items, contributing to a cozy and inviting atmosphere. Their rounded forms can soften the often-straight lines found in interior design, adding a touch of handcrafted elegance.Curtains adorned with scalloped edges can frame windows beautifully, creating a focal point that is both functional and decorative. Placemats and table runners with scalloped borders add a touch of sophistication to dining settings, perfect for special occasions or everyday enjoyment.
Bedding, such as duvet covers or pillowcases, can also benefit from this charming detail, lending a quaint or romantic feel to the bedroom. Imagine a set of scalloped-edge placemats that evoke a classic tea party aesthetic, or curtains with a deep scalloped trim that adds a touch of old-world grandeur to a living room.
Scalloped Edges in Accessories
Accessories are ideal canvases for showcasing scalloped edges, allowing for creative expression in smaller, more personal items. These details can add a unique signature to an accessory, making it stand out from mass-produced alternatives.Bags, whether tote bags, clutches, or cosmetic pouches, can feature scalloped flaps, pocket edges, or entire bag openings, adding a delightful visual element. Scarves with scalloped ends offer a gentle drape and a touch of femininity, while hats can be embellished with scalloped brims or decorative band details, providing a charming finishing touch to an outfit.
A handmade tote bag with a scalloped pocket for keys and phone is both practical and stylish, and a delicate scarf with scalloped edges can add a sophisticated flourish to a simple outfit.
Project Ideas Featuring Scalloped Edges
The versatility of scalloped edges allows for their integration into a multitude of projects, offering endless possibilities for personalization and design. Below is a list of project ideas that prominently feature scalloped edges, categorized for ease of inspiration.
- Apparel:
- Children’s dresses with scalloped hemlines and sleeve cuffs.
- Tops with scalloped necklines and empire waistbands.
- Skirts with tiered scalloped layers or a single scalloped hem.
- Baby bibs with a soft, scalloped edge for a gentle finish.
- Pajama sets with scalloped trim on collars and cuffs.
- Home Decor:
- Pillow covers with scalloped edges on all sides.
- Tablecloths with a decorative scalloped border.
- Quilts with scalloped borders for a unique frame.
- Wall hangings or decorative banners with scalloped edges.
- Fabric storage bins with scalloped top edges.
- Accessories:
- Tote bags with scalloped pocket details or flap closures.
- Cosmetic bags with scalloped zipper edges.
- Handkerchiefs or small decorative cloths with scalloped corners.
- Hair accessories like headbands or scrunchies with scalloped trim.
- Pet accessories such as bandanas or small pet beds with scalloped edges.
Visualizing Scalloped Edge Designs
Understanding the visual impact of different scalloped edge designs is crucial for achieving the desired aesthetic in your sewing projects. The size, shape, and finishing techniques all contribute to the overall look and feel, transforming a simple fabric edge into a decorative element. By visualizing these characteristics, you can better select and execute the perfect scallop for your creation.The beauty of a well-executed scalloped edge lies in its precision and elegance.
Whether it’s a subtle detail or a bold statement, the visual appeal comes from the smooth curves and the defined points that create a harmonious flow along the fabric’s edge.
Small Scallop Characteristics
A perfectly executed small scallop is characterized by its delicate and refined appearance. The curves are gently rounded, and the points are sharp yet not overly pronounced, creating a subtle and sophisticated finish. These small scallops are ideal for projects where a touch of understated elegance is desired, such as on handkerchiefs, delicate collars, or the hems of lightweight garments.
The visual effect is one of fine craftsmanship and attention to detail, adding a touch of vintage charm without being overwhelming.
Large Scallop Appearance
A larger, more dramatic scallop shape offers a bolder visual statement. The curves are more pronounced and sweeping, and the points are deeper and more defined, creating a striking and eye-catching effect. These larger scallops are well-suited for projects where a significant decorative element is desired, such as on the edges of curtains, the hem of a flowing skirt, or as a prominent feature on a tablecloth.
The visual impact is one of grandeur and playful sophistication, drawing attention to the fabric’s edge and adding a distinct personality to the design.
Texture and Dimension of a Stitched Scalloped Edge
A stitched scalloped edge adds a tactile and visual dimension that goes beyond a simple cut edge. The stitching itself, whether it’s a single line of straight stitch, a decorative zigzag, or a more intricate embroidery, creates a raised texture along the curve and points. This raised effect catches the light and adds a subtle depth, making the scallop appear more substantial and finished.
The interplay of the fabric, the thread, and the defined shape creates a visually engaging and pleasing texture that enhances the overall garment or item.
Scalloped Edges on a Tiered Garment
When a scalloped edge is applied to a tiered garment, it enhances the visual flow and definition of each tier. The curves of the scallops on one tier can subtly echo or contrast with the silhouette of the tier above or below it, creating a sense of rhythm and movement. For example, on a ruffled skirt with multiple tiers, each ruffled edge finished with scallops would create a cascade of soft, decorative waves, adding a whimsical and romantic feel.
The scallops serve to frame each tier, preventing the tiers from blending into one another and highlighting the layered construction of the garment.
Scalloped Edge with Contrasting Thread
A scalloped edge finished with a contrasting thread offers a vivid and striking visual effect. The chosen thread color stands out against the fabric, making the shape of each scallop clearly defined and visually prominent. This technique can be used to add a pop of color or a graphic element to a project. For instance, a white fabric with a black scalloped edge would create a bold, graphic statement, while a pastel fabric with a brightly colored contrasting thread would add a playful and eye-catching detail.
The contrasting thread essentially draws attention to the craftsmanship and the deliberate design of the scalloped edge, turning it into a focal point.
Epilogue
As we conclude our exploration of sewing scalloped edges, we’ve uncovered a world of creative possibilities, from the simplest curves to intricate layered designs. Whether you’re a beginner looking to add a unique flair to your projects or an experienced crafter seeking new inspiration, the techniques discussed provide a solid foundation for achieving professional-looking results. Embrace the versatility of scalloped edges and let them transform your sewing endeavors into pieces of art that are both charming and beautifully crafted.